INFRARED (IR) SENSOR
Infrared (IR) radiation was first discovered by an astronomer named William Herchel in 1800.
When he was measuring the
temperature of each color of light (separated by a prism), he noticed that the
temperature just beyond the red light was highest .As IR is invisible to the
human eye, since its wavelength is longer than that of visible light therefore
by observing this phenomenon he discovered infrared light.

Basically, there are two
types of infrared (IR) sensors:
·
Active
·
Passive.
Active
Infrared (IR) sensor
It perform both
the phenomenon i.e. emitting and detecting infrared
radiation. Active IR sensors have two parts:
·
light emitting diode (LED)
·
Receiver
An infrared (IR) sensor is an
electronic device that measures and detects infrared radiation in its
surroundings.
When an object comes close to the sensor,
the infrared light from the LED reflects and the
object is detected by the receiver. Active IR sensors act as proximity
sensor and they are commonly used in obstacle detection systems .For
example as in robots.
Passive
Infrared (IR) Sensor
Passive
infrared (PIR) sensors detect only the infrared
radiation and do not emit it from an LED. It is made of:
·
A pyro-electric sensor
·
An infrared
filter (which blocks out all other wavelengths of the light)
·
A lens (which collects light into a
single point)
A coating to protect the
sensor from other environmental variables, such as humidity, temperature
etc.
Generally
these sensors are used in motion-based detection. For example as in-home security
systems.
THE IR
SENSOR CONSIST OF MAIN TWO CONPONENTS:
·
IR
TRANSMITTER
·
IR RECEIVER
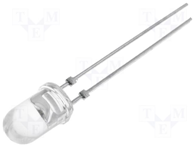
Infrared (IR) Transmitter
Infrared Transmitter is a light
emitting diode (LED) that emits infrared radiations. It is also commonly known
as IR LED. Even though an IR LED looks like a normal LED, the radiation emitted
by it is invisible to the human eye as the radiations are infrared radiations.
This is the image for an IR
LED.

There are different types
of infrared transmitters depending upon their wavelengths, output power and
response time.
A simple infrared (IR) transmitter can be constructed using:
·
An infrared
LED
·
a current limiting resistor and
·
A power supply.
Working for an IR Transmitter
When the transmitter is operated
at a supply of 5V, it consumes about 3 to 5 mA of current. Therefore, it can be
modulated to produce a particular frequency of infrared light as required.
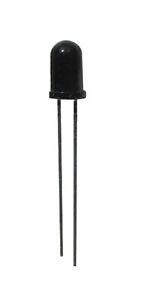
INFRARED (IR) Receiver
Infrared receivers are also
called as infrared sensors. They detect the radiation with an IR transmitter.
It comes in the form of photo diodes and photo transistors. Infrared photo diodes
are different from normal photo diodes because they detect only infrared
radiation.
This is the image for an IR receiver.

It consists of:
·
An IR
phototransistor
·
A diode
·
A MOSFET
·
A
potentiometer and
·
An LED
Working for an IR receiver
When the photo transistor receives any infrared
radiation, current flows through the circuit and MOSFET turns on. This lights
up the LED which acts as a load. Here the potentiometer is used to control the
sensitivity of the photo transistor.
OVERALL WORKING
The overall working of an
IR sensor is that it works as an Object Detection Sensor. An IR sensor consists
of an IR LED and an IR Photo diode; as mentioned above together they are also
called as Photo – Coupler or Octo – Coupler.
When the IR transmitter emits
radiation, it reaches to the object and some of the radiation reflects back to
the IR receiver. Based on the receiving intensity of the IR receiver, the
output of the sensor is defined.
CONNECTIONS
The sensor has 3 pins:
·
VCC
(connected to +5V of Arduino)
·
GND
(connected to GND of Arduino)
·
D0 or OUT(connected
to digital output pin of Arduino)
A simple example for blinking of Arduino led and observing digital
output on serial monitor:
const int Sensor=2;
int input = 0;
void setup()
{
pinMode(13, OUTPUT);
//
Pin 13 has an LED connected on most Arduino boards:
pinMode(Sensor,INPUT);
//Pin 2 is connected to the output of
proximity sensor
Serial.begin(9600);
}
void loop()
{
if(digitalRead(Sensor)==HIGH)
//Check the sensor output
{
digitalWrite(13, HIGH);
// set the LED on
}
else
{
digitalWrite(13, LOW);
// set the LED off
}
input = digitalRead(Sensor);
Serial.println(input);
delay(1000);
//
wait for one second
}
Comments